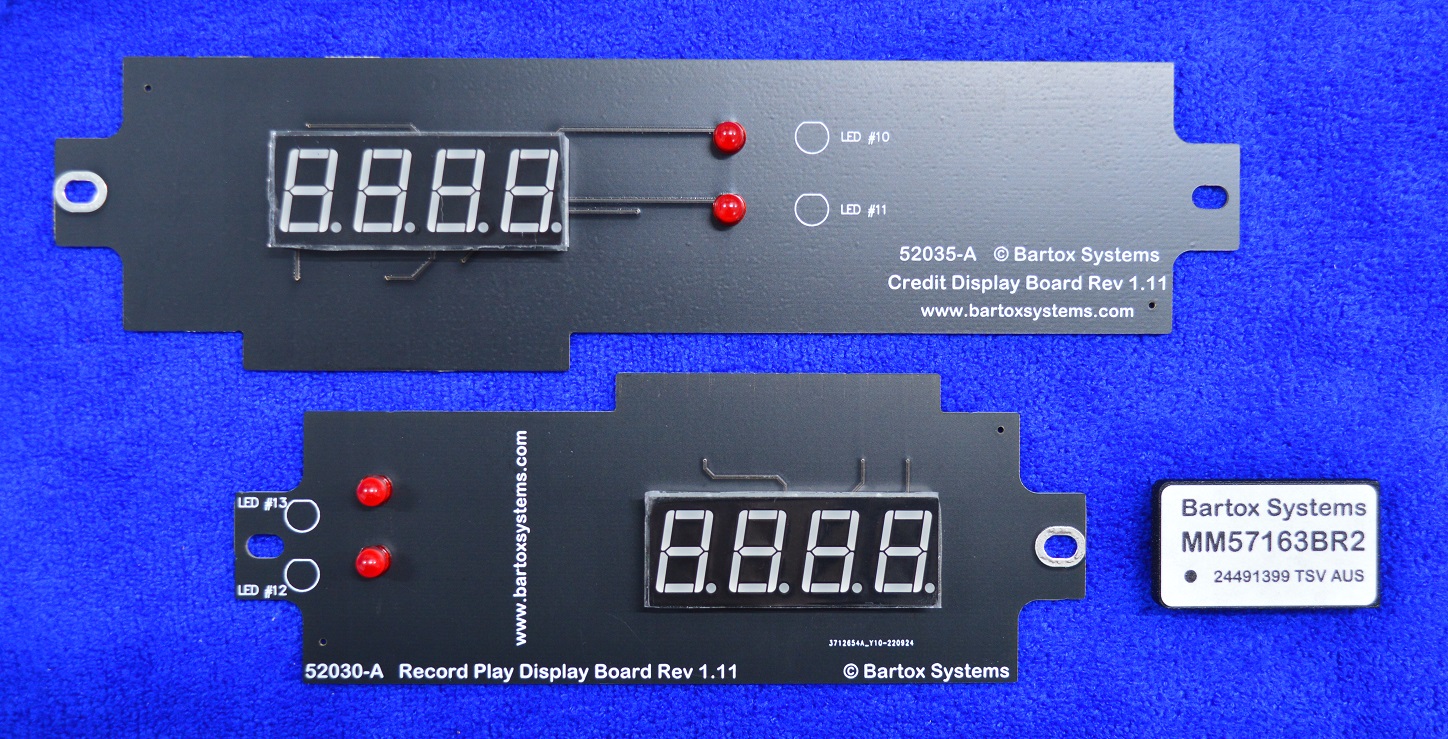
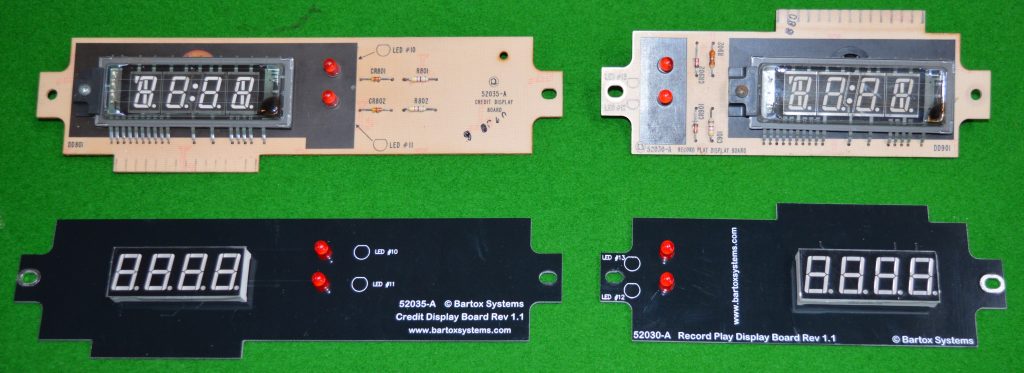
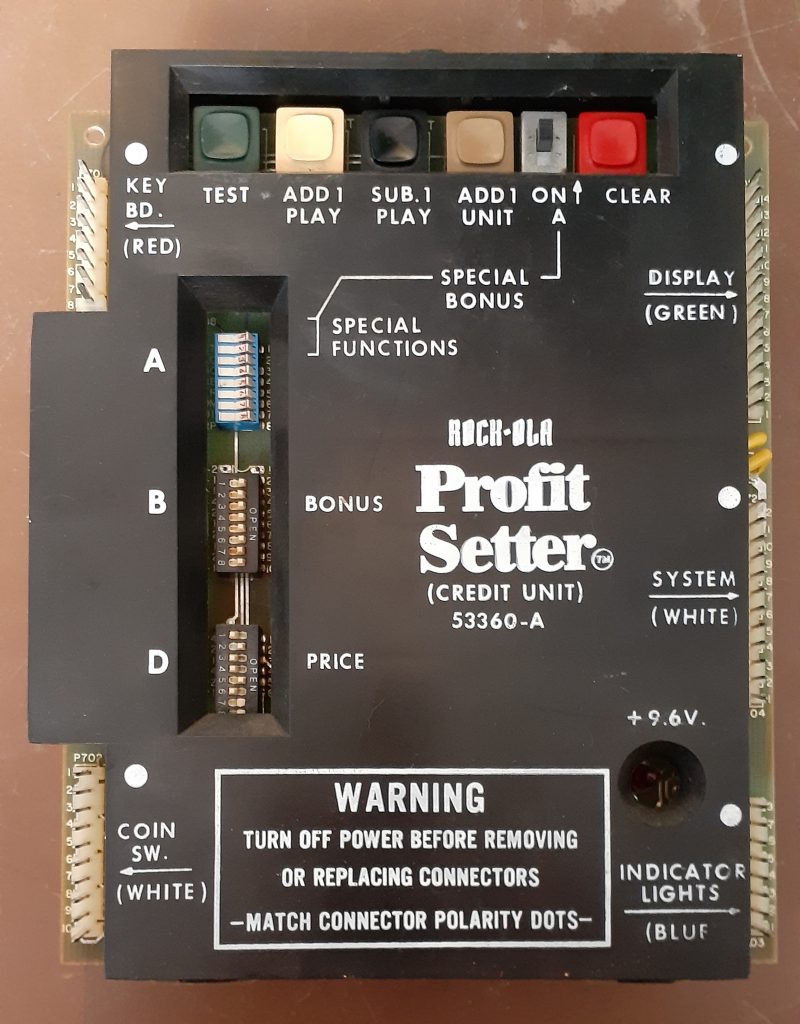
These new display boards are direct replacements for Rock-Ola boards 52030-A and 52035-A found in the MAX series of Jukeboxes that were manufactured by Rock-Ola from 1979. The original Rock-Ola Vacuum Fluorescent Displays fail over time and replacements are not easily obtainable. The new display boards feature LED display technology and are direct drop-in replacements for the old-style displays. Additionally, the new displays can be used with the original display driver IC (MM57163N) located in the Profit Setter Module.
Note that in a lot of cases the MM57163N chip itself is also faulty and for this reason, it is included in the Kit.
(The MM57163N is also available separately)
Installing the Display Boards
Fold down the display panel to expose the back of each of the display boards.
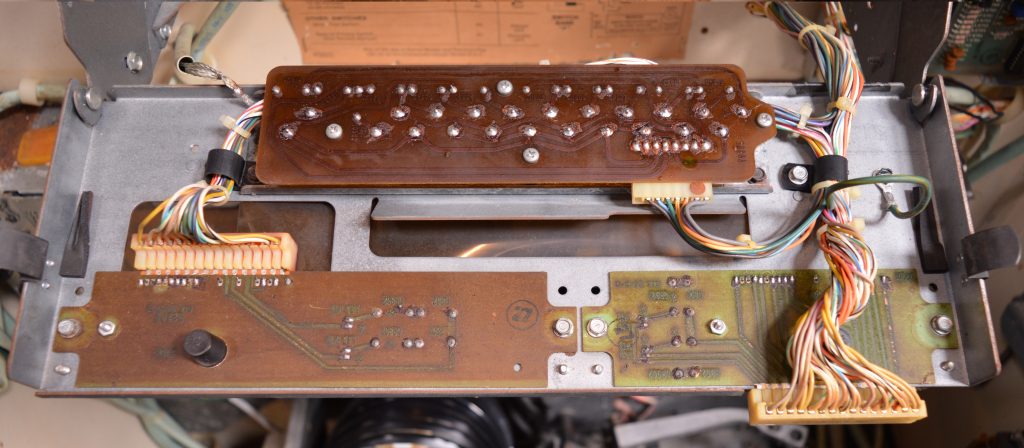
Unplug the old displays and unscrew to remove both from the bracket.

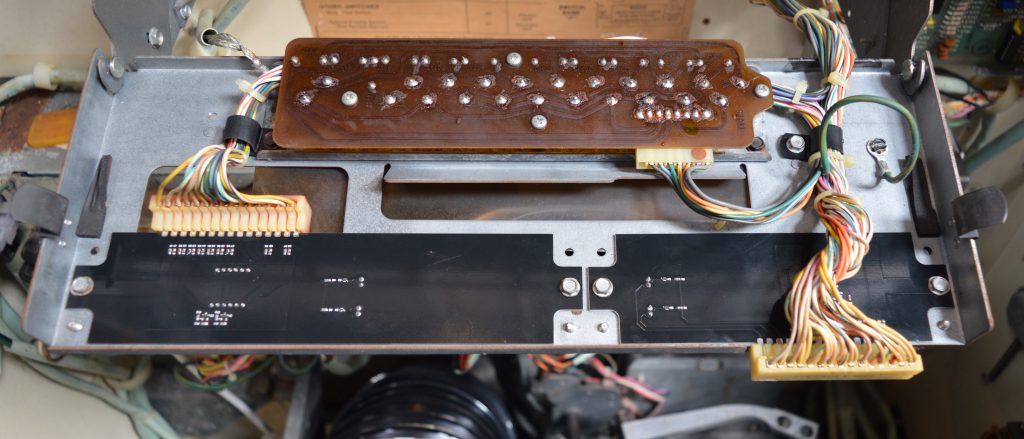
Install the new displays by screwing them into the bracket and reconnecting the edge connectors
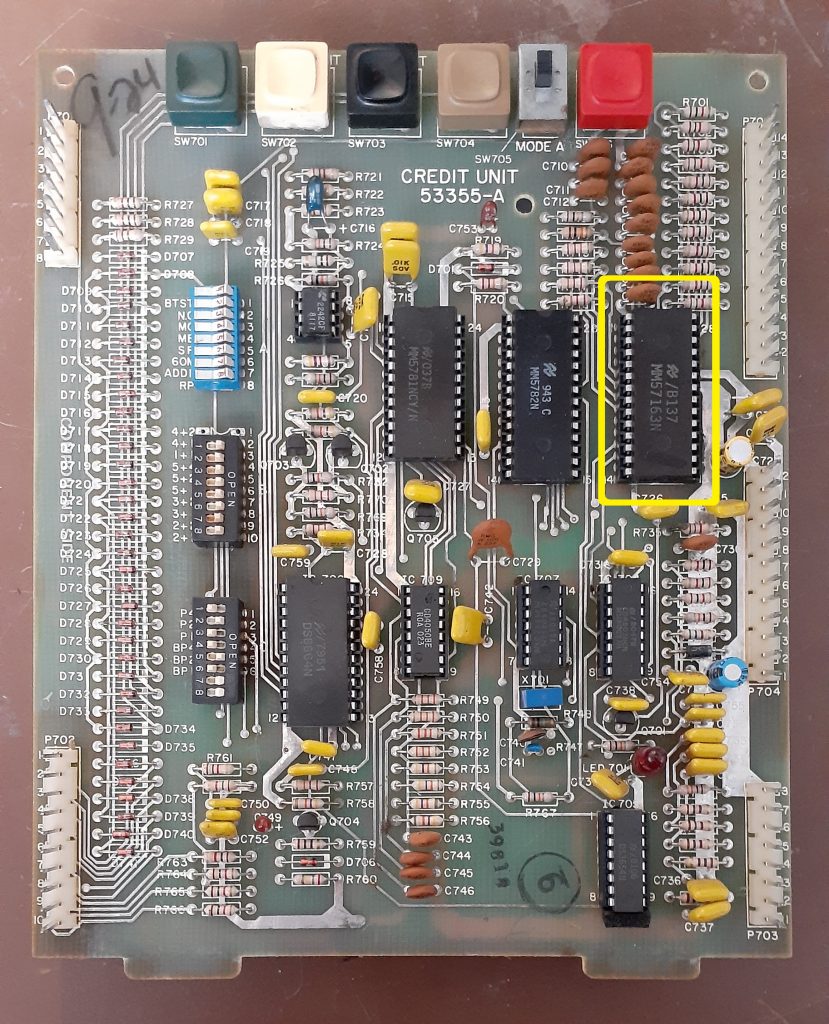
MM57163 Installation
Please note the location of Pin 1

Installing the MM57163N is different depending on your version of Max Jukebox. The MAX 477 and 481 are shown
MAX 477
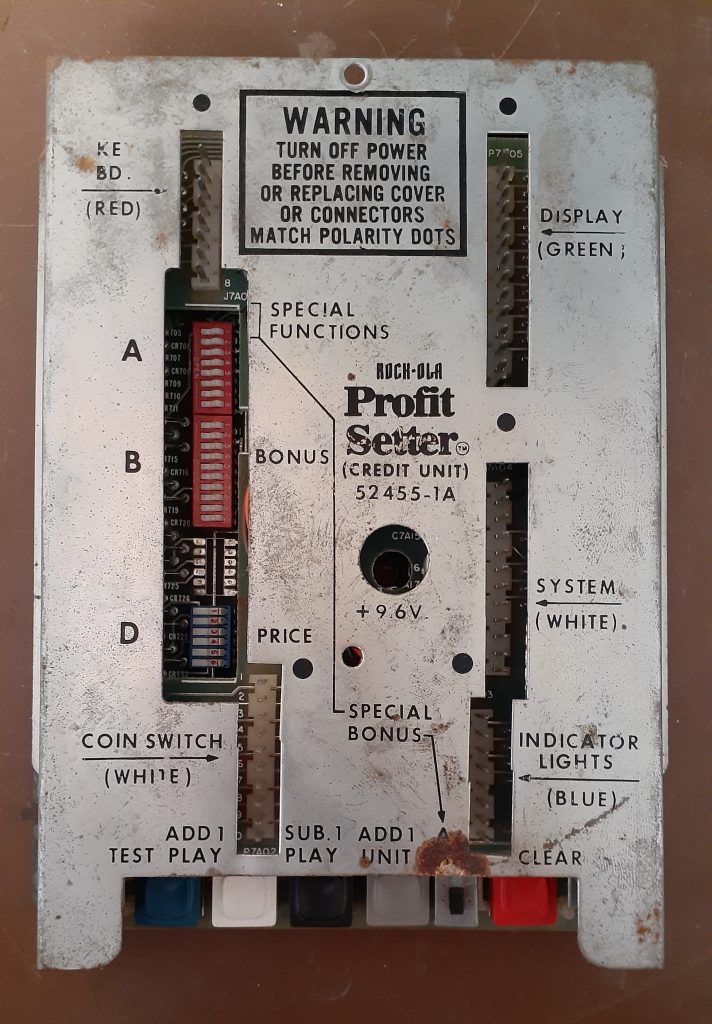
Take the Credit unit out of the Jukebox and remove the top cover.
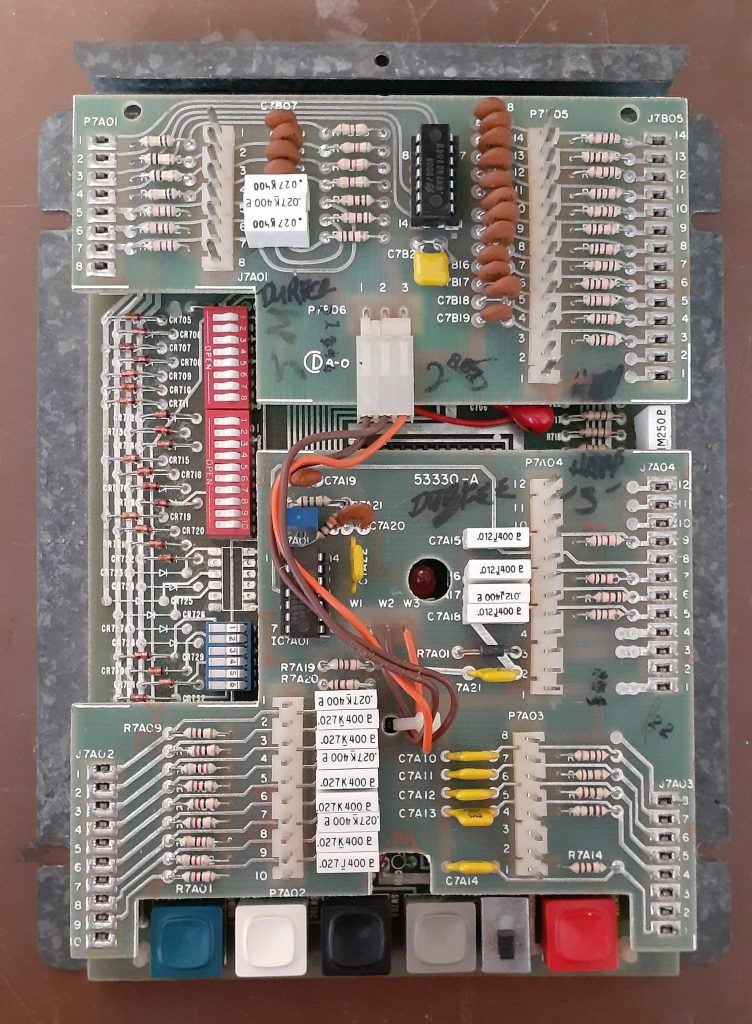
Remove the top rider board to expose the bottom board.
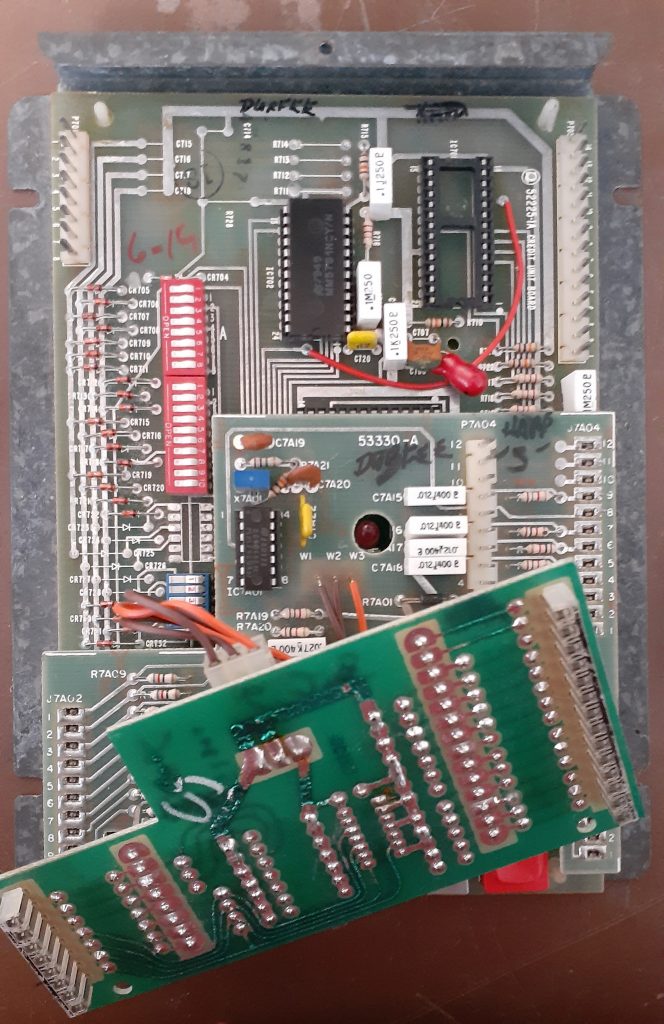
Remove the old MM57163N
Install the new one then reinstall the Credit unit into the Jukebox
MAX 481
Take the Credit Unit out of the Jukebox and remove the top cover
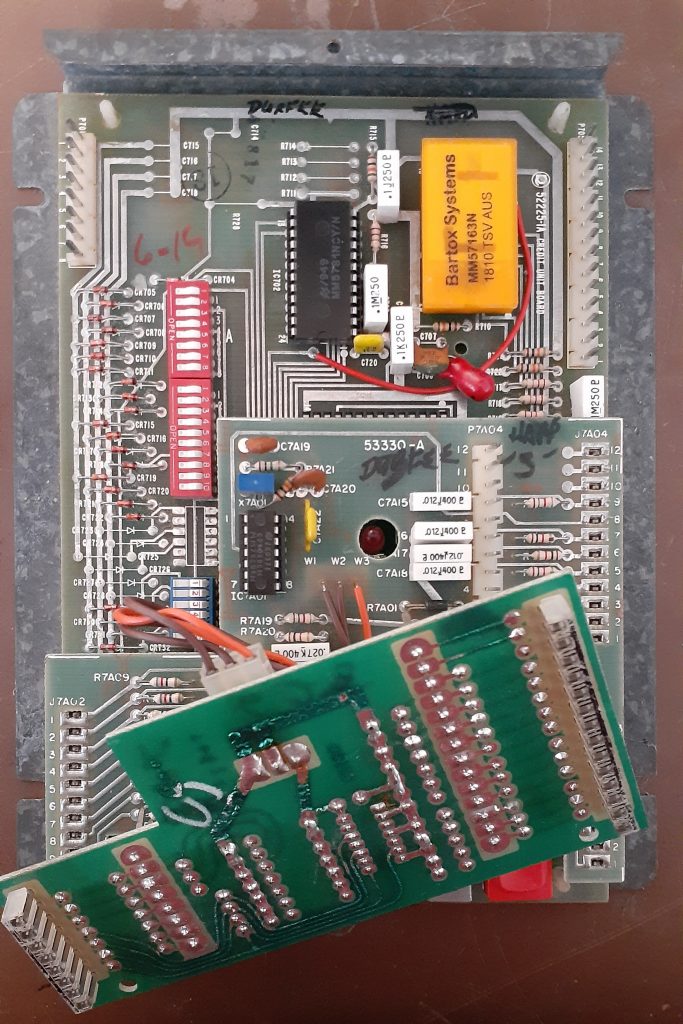
Remove the old MM57163N and install the new one
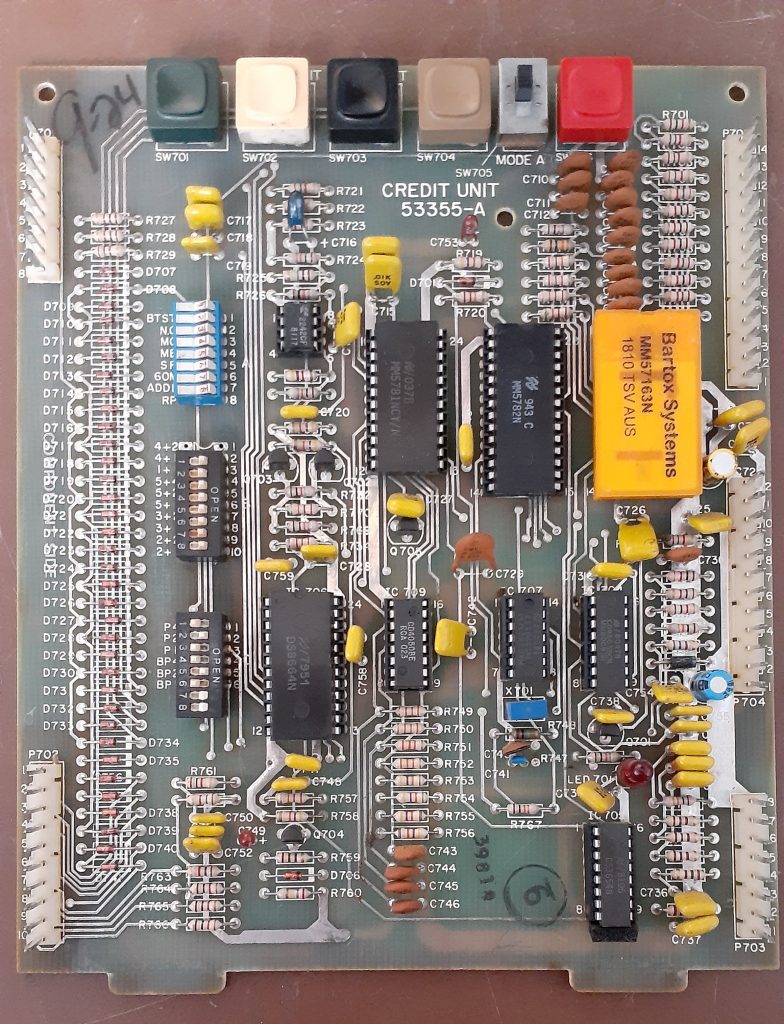
Reassemble and reinstall the Credit Unit into the Jukebox
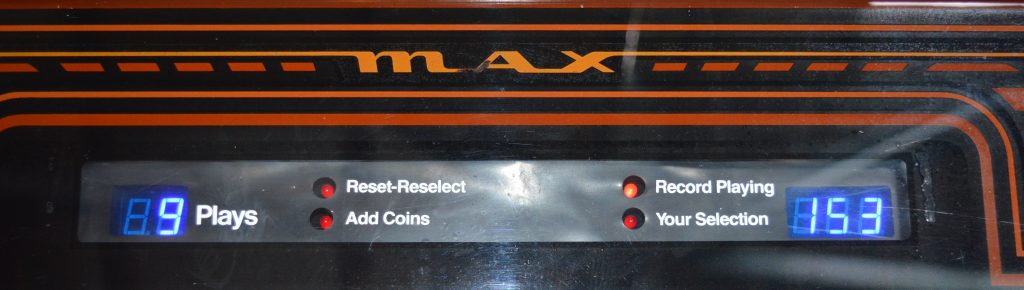
The completed retrofit will look like this when complete

The Complete Installation guide can be found here